When you want to record video calls and voice chats in the web version of Viber, you can use
Renee Video Editor Pro to do it.
What is Renee Video Editor Pro?
Renee Video Editor Pro is a comprehensive video recording and editing tool that combines screen recording, post-production, and format conversion capabilities. It offers customizable features such as
recording area selection,
watermark customization, and
automatic recording scheduling. Simplifying the process with just
one click, it is ideal for capturing online videos, recording meetings, or documenting software operations.
This software offers a range of features to enhance and optimize video content during post-production. Users can edit and merge video clips, crop and rotate videos, add opening and ending animations, switch between filter styles, dub videos, add music, import or create subtitles, and apply transition effects. The software supports conversion to various formats including MXF, AVI, MKV, MP4, MOV, M2TS, M4V, AAC, AC3, and more, as well as free conversion between video and audio formats.
How to record Viber calls with the help of Renee Video Editor Pro?
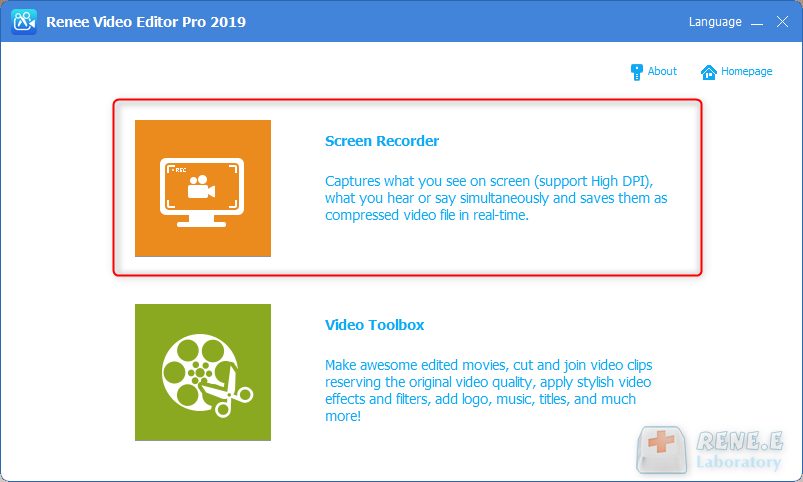
Step 1: After running the software, click the (Screen Recorder) option on the main page.
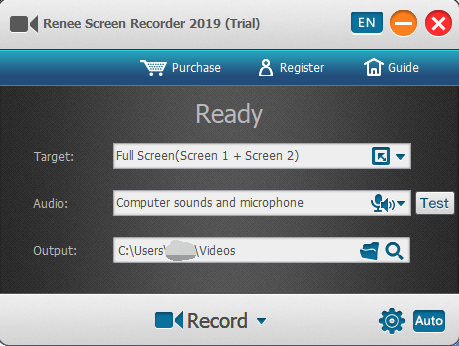
Step 2: Next, in the “Prepare to Record” interface, you can personalize the content to be recorded (recording target), (Audio recording source) and (output directory). If you want to record Viber video calls, you can choose the “Custom” recording area, and choose the “Computer sound and microphone” option; if you want to record Viber voice chat content, you can choose the “Custom” recording area, and select the “Microphone” option.
Description of interface settings for preparing to record:
Target: Supports recording full screen, custom area, and recording images captured by the camera.
Audio: refers to the sound that needs to be recorded during the content recording process. It supports recording computer sound, microphone sound, and non-recording sound, etc.
Output: select the storage location of the recorded files
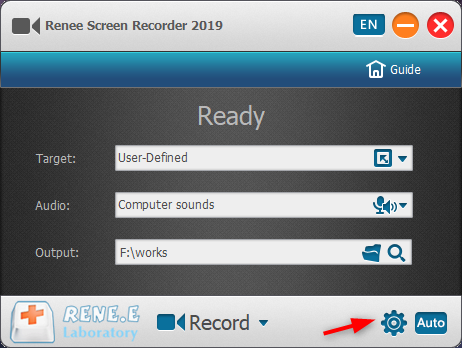
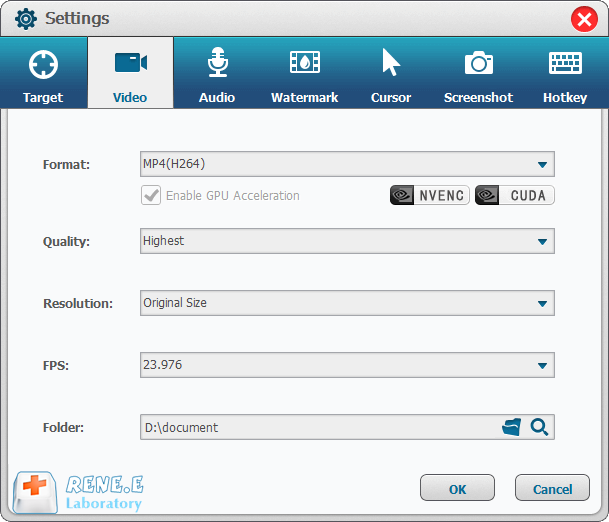
Step 3: In addition, click the Settings icon in the lower right corner, and you can also personalize the recording format, video quality, resolution, video frame rate, output directory, watermark and other parameters of the content to be recorded.
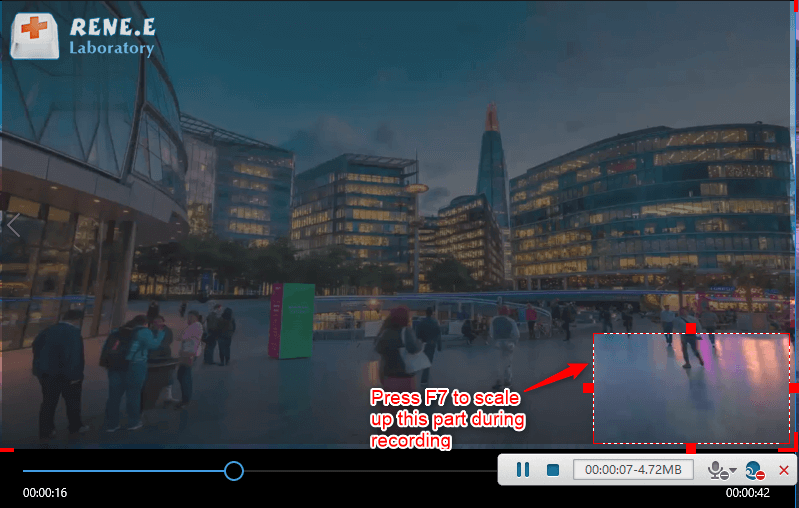
Step 4: After all the recording parameters are set, return to the “Ready to Record” interface, click the (Start Recording) button, you can select the recording area you want to record, and then click the (Record) button in the lower right corner to start It is very convenient to record text/voice/video call content.
Step 5: You can pause or continue at any time during the recording process.
After the recording is completed, click the small square button in the recording option box in the lower right corner, and the recorded video content will be saved to the preset path according to the parameters you originally set.
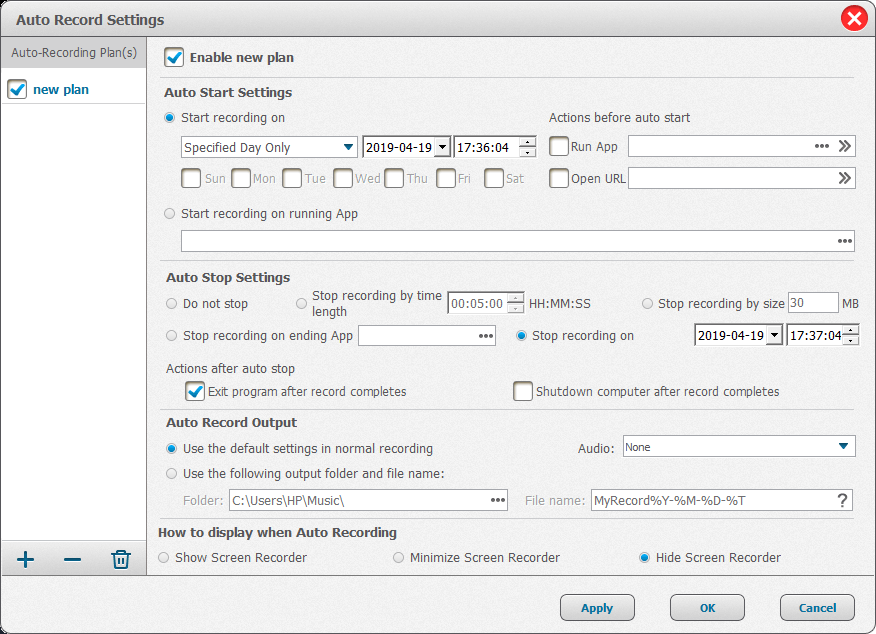
In addition, Renee Video Editor Pro also offers the automatic recording feature. This allows you to prepare for recording before starting a video call, customize the start and end time, and avoid interrupting the call by adjusting recording settings during the call. The process is simple and easy to use. On the “Ready to Record” interface, simply click the (Auto) button in the bottom right corner to access the automatic recording page. From there, you can set the desired start and end time for the recording. Once the time is up, the software will automatically execute the recording command, making it a convenient and hassle-free experience.
AZ Screen Recorder is a special screen recording software designed for Android phones. It offers a user-friendly experience with simple navigation and controls, allowing you to effortlessly capture video and audio content from your phone’s screen. Using this tool to record Viber calls is very simple, the specific steps are as follows:
To begin, simply download and install the AZ Screen Recorder software. Once launched, a screen recording toolbar with four icons will appear. Open the Viber software and navigate to the desired screen or recording interface. Click the red start recording button on the far left of the toolbar to initiate the screen recording. The start button will then transform into a stop button. When finished, click the stop button to end the recording. This process is incredibly convenient and user-friendly.
Tip: If you want to record Viber while recording your screen, you can check the (Enable audio recording) option in the settings.
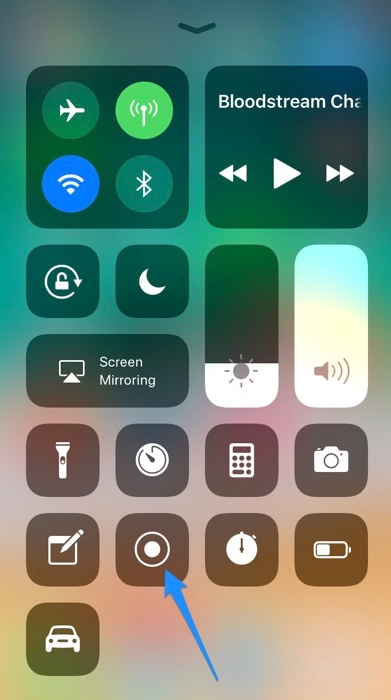
The built-in screen recording function of the iPhone can directly help you record Viber audio calls or video calls, just make sure that your iPhone system is updated to iOS11 or later.
The specific operation steps are as follows:
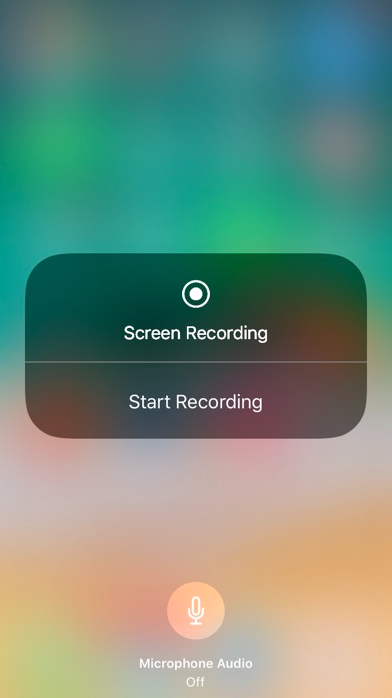
Turn on the iPhone, find (Settings)-(Control Center) and click the (Custom Control) option. Click the plus sign in front of (Screen Recording) to add it to Control Center. After the (Screen Recording) function is added, swipe up or down the screen to find and click the small dot (Screen Recording) icon in (Control Center), and the screen will start recording after three seconds.
You can start recording the screen in advance, and then open Viver chat interface. Once your recording is finished, return to the Control Center and click the screen recording button again to end the recording. Your recorded video or audio will then be automatically saved in your photo album.
Tips: Before starting to record, please long press the record button and turn on the microphone, then the sound from the microphone will also be recorded.







User Comments
Leave a Comment